
 Team Out of Town
Travel Photography Tips for Beginners
I started photography 13 years ago using a borrowed camera on my trip to the African Sahara. It wasn’t the best camera, a basic point-and-shoot, but it did the job. Now I’m still looking at those pictures, and I’m wondering why I didn’t choose another spot. Why didn’t I adjust the light? Would it have been better to use a DSLR to capture those night scenes?
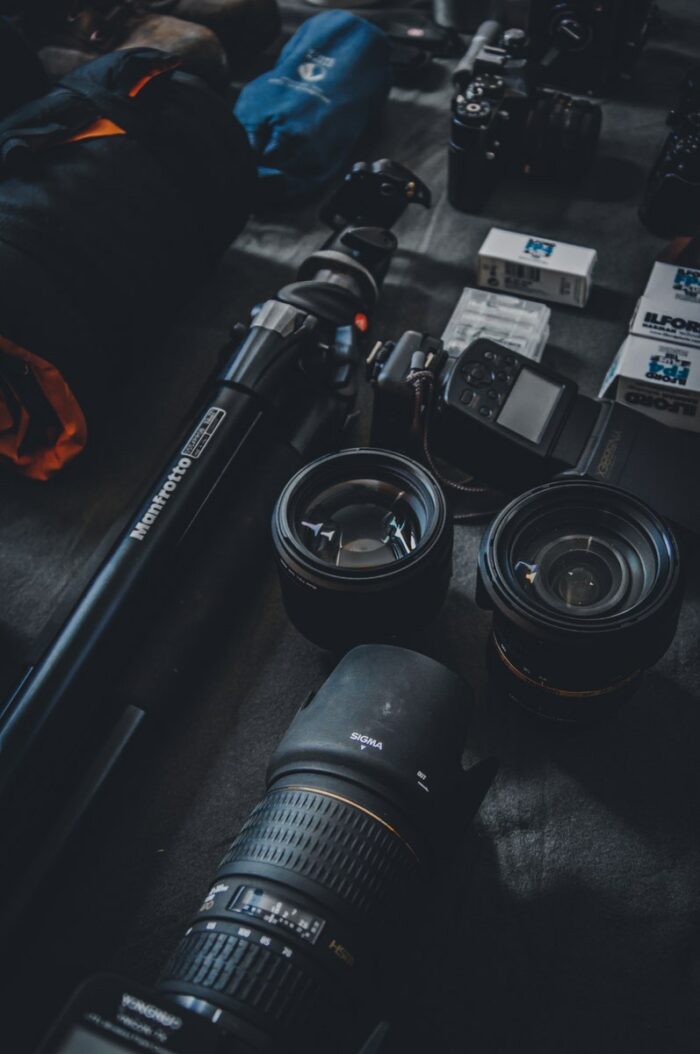
Choose Travel Camera
So I’m writing this article to share simple travel photography tips for beginners to take outstanding pictures and improve the quality of those souvenirs.
CHOOSING A CAMERA
I can’t recommend a specific camera because I don’t know your budget or photography style.
I can recommend one thing: get a camera if you don’t have one. It doesn’t matter whether it’s mirrorless or DSLR, or which brand you like, but consider something more durable than a basic point-and-shoot. It all depends on your budget and how much you are willing to invest to capture good moments and turn those souvenirs into pictures.
Trust me you’ll remember the first picture you take with your camera, you would be very excited and start shooting pictures of people you know, the street light by night, or even trying the macro feature focusing on a flower.
The process of taking pictures is really different from creating pictures, to make a photo you need to have some travel photography basics, and we’re not talking about developing an eye for photography or going to be a professional and selling your pictures to National Geographic magazine.
We’ll cover the skills you need to frame and compose what you want in every picture.
You can start with your current budget camera to practice these tips, then move forward and buy a more advanced camera like a DSLR.
The first tip will be knowing your camera, taking the time to learn about your camera I took it out the option you have or don’t on your actual camera. And figure out the buttons you have on the camera and why they are so important.
Start with the buttons, then scroll through the menus, change the camera settings, and keep exploring new modes and testing features.
All this is to reduce the time you spend trying to take the best picture you want, because you already know the menus and modes, so it’s easy to choose what to use when it’s time to shoot.

Trying to figure out your camera’s limits: does it capture night scenes or indoor pictures (low-light) well, portraits, or is it just a camera to play with for outdoor pictures? It’s critical to know whether your camera has features like digital stabilization or Optical Zoom.
I know that information may be overwhelming, but we’ll cover each one in the next parts.
BEST GEARS FOR TRAVEL PHOTOGRAPHY
TRIPODS
Tripods are one of the essential accessories you need for your camera; whether you are shooting family photos, landscapes, or adventure images, you’ll need to keep your camera steady.
A Tripod will truly help you choose the best spot and gives you more potential in low light. Traveling with a tripod lets you get creative and take your photos to the next level with long-exposure photography and slower shutter speeds, especially if your camera doesn’t have built-in stabilization.
We already mentioned that you need to use manual settings, so a Tripod will help you achieve the perfect composition.
Choosing the best Tripod for your travel photography depends on your budget, other things to keep in mind when choosing a Tripod is the weight, Lightweight tripods tend to be more convenient for travel photography, you can pick a tripod who’s made from Aluminum or carbon fiber, and it’s more resistant and lighter. Also, check the tripod’s folding size before packing it.
FILTERS
Filters are basically designed for lenses; most photographers use one or more of those filters:
UV filters: mostly used to prevent lens scratches and absorb UV light from the scene.

Polarizing filters: designed to control the color and contrast of the picture, reduce light in a scene, and manage reflected light. Can be used for landscape photography (get a perfect blue sky), used for street photography (to remove the glare effect and get the best saturation)
Neutral Density filters: ND filters reduce light without changing colors, perfect for long exposures, daytime shots, and capturing beautiful landscapes. Also good for portraits and controlling depth of field.
If you are using a point and shoot camera you should be using in-camera filters, it works almost the same as the physical filters but produce less quality.
SPARES
I’m a Light Traveler, so I prefer lightweight gear, but I can’t travel without spare Memory Cards and a spare Battery for my camera. I also pack a Power Bank to charge my phone and camera at the same time.


Also, I make sure to carry a headlamp; I always pack a flashlight and make sure it’s fully charged before I go on a trip. It’s really helpful if you are not carrying a tripod and want to take shots in low light or for night photography.
LENSES
The first camera professional camera I got was a Canon, that comes with an 18-55mm lens, after a while, I invested in a 50mm lens, mostly to get the best depth of field when taking portraits, also I got 70-300mm lens to try zoom capabilities and features.

It took me time to understand how each lens works and the best settings for every lens, so I’ll be talking about three categories of lenses that you can choose from depending on your personal style in photography:
Standard prime lenses: these have a fixed focal length (you can’t zoom with them); they can be 35mm, 50mm, or even 100mm. Prime lenses work best for street photography, taking portraits, and wedding photography. In some cases, landscape photography.
Zoom lenses: I prefer this type of lens for better travel photos. Zoom lenses aren’t as fast as prime lenses, but they offer more flexibility with their zoom range and variable focal length.
Wide-angle lenses: I personally don’t possess any of those, but I tried 10mm (also called a fish-eye lens) to get a wider field of view to capture some outstanding landscape pictures and cityscapes.
CHOOSING THE RIGHT GEAR
Another tip for travel photography is to have the right gear. You don’t need to invest a lot of money to get the best gear on the market, but think about your travel style and what gear you can work with. You can either pick a DSLR camera or a mirrorless camera, combined with a tripod and a couple of pictures, and you are ready to start your journey as a beginner photographer.
BEGINNERS TRAVEL PHOTOGRAPHY RULES
LIGHT
The key element in photography is lighting, or how to use light to take pictures. Good lighting makes a good picture; the perfect spot combined with the perfect lighting produces the perfect photo.
The difference between a beginner and a professional photographer is knowing how to use the lights. With this comes knowing the best moments of the day to take perfect pictures.
Most professional photographers shoot in the morning or afternoon sun; those are the golden hours. Golden-hour light is soft and has a calibrated temperature that helps you get the best picture.
We can’t talk about light without light sources, another key factor, especially when shooting indoors or when natural light is hard to get.
Let’s keep it simple: if you’re just starting out, look for easy light, like soft or indirect light (sunlight is the best natural light source).
Example if you’re looking to take a picture of a building or landscape (static scene) you can go back to the same spot on a better day when you have better light. Or go back during golden hour.
The best time to take pictures is after sunrise and before sunset: 1 to 2 hours after sunrise and 1 to 2 hours before sunset. It depends on where you’re visiting and the time of year (summer or winter).
GOLDEN AND BLUE HOURS
Now we did pack well, and we have the required gear, we need to focus on the best moment of the day to take outstanding pictures, here it comes the Golden and the Blue Hours moments.

Most photographers say waking up early and staying up late is the best photography advice; it’s all about the light. Those moments give you the best light for better photos.
The Golden Hour: it’s that time of the day when the sun is close to the horizon, just after sunrise or just before sunset. Golden hour light is warm, directional, and has the right temperature to create the golden effect you see in professional photographers’ work.

The Blue Hour: when the sun is below the horizon, just after sunset and just before sunrise, the blue hour generally lasts for less than an hour. The lights produced during the blue hour are soft, and the sky turns blue.

To be noted, the golden hour on the hour is basically used for outdoor photography; it can be landscape photography or street photography.

Set an alarm and get up early to enjoy the best moments and capture the perfect shots. Because midday shooting depends on the weather and the light, use that time to scout locations and prepare your photo session.
COMPOSITION
Photography isn’t an exact science; don’t expect to follow a tutorial and get the exact same results as other photographers. Learn some of the rules of photographic composition to get better picture quality and improve your photography skills:
The Rule of Thirds
One of the classic photography tips, it is a simple principle: break a picture into thirds, both horizontally and vertically, using your camera settings or your DSLR’s viewfinder. As a result, you’ll see a grid with four intersections marking the most important parts of the picture.
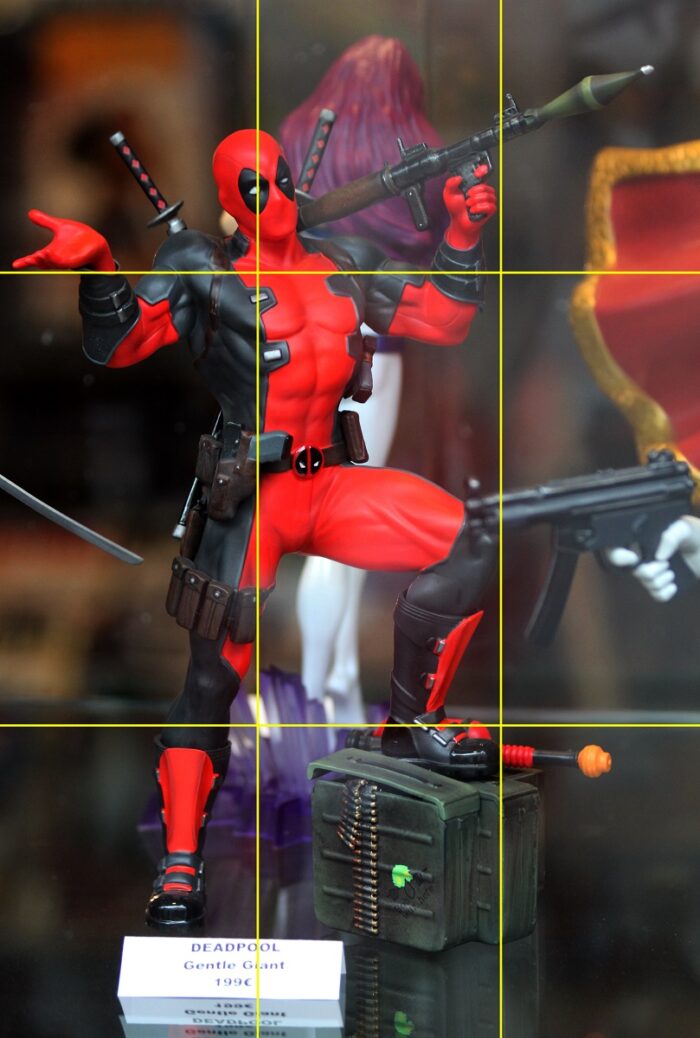
When taking a picture, place the object near or on an intersection line to balance the object with the scene.

For example, if you are taking close portraits, place the person’s eye on an intersection point. It takes time, but keep practicing the rule of thirds and make it a habit when taking pictures. You can also try editing your past pictures using the rule of thirds in post-processing.
Check the Horizons
Always make sure the horizon is straight. If you don’t have a horizon in your scene, make sure the photo composition includes other aspects like symmetry or visual weight.
Human Element
To make a picture more interesting, you can use a human element. Unlike landscape photography, mountains and valleys don’t change, so including a human element in a picture will make it more interesting, even if the person would be small compared to the scene, but it’s a valuable addition to the picture to get a better sense of scale of how big those mountains and valleys are.

Also, when adding a human element, try shooting anonymously and hiding the person’s face to give the feeling that you’re experiencing the location yourself.
Get Closer
I remember when I started taking pictures, I always tried to show people my work and explain why the picture is good and what element they should be looking at. It took me some time to notice that it doesn’t matter if you are trying to explain your picture; you need to make it speak for itself. That is why it’s important to capture details and get closer to your subjects.

Making pictures from a fixed position or from your tour bus isn’t the best idea, move your feet around and you’ll capture the moment as you saw it, and the picture will explain everything you experienced at that moment.
FRAMING
Framing is as important as composition; sometimes you take pictures and, when you get home, you find the framing was poor and you didn’t capture all the subjects in the scene.

Photography framing is an important part, it includes composition and other photography rules (like the rule of thirds), so after finding a subject that you want to show try looking around and to make sure to compose and combine with other subjects, move around, zoom-in and zoom-out until you get the best composition.
When looking through your viewfinder, focus on the subject, but don’t cut off other important elements, like a person’s feet or a passing car, that make a perfect shot.
DIFFERENT ANGLES
If you look at a magazine cover and the picture that instantly catches your attention, it’s often taken from an angle different from the ordinary eye level; sometimes mixing things up makes better pictures. Try new perspectives; it gives you a new view of the same scene.
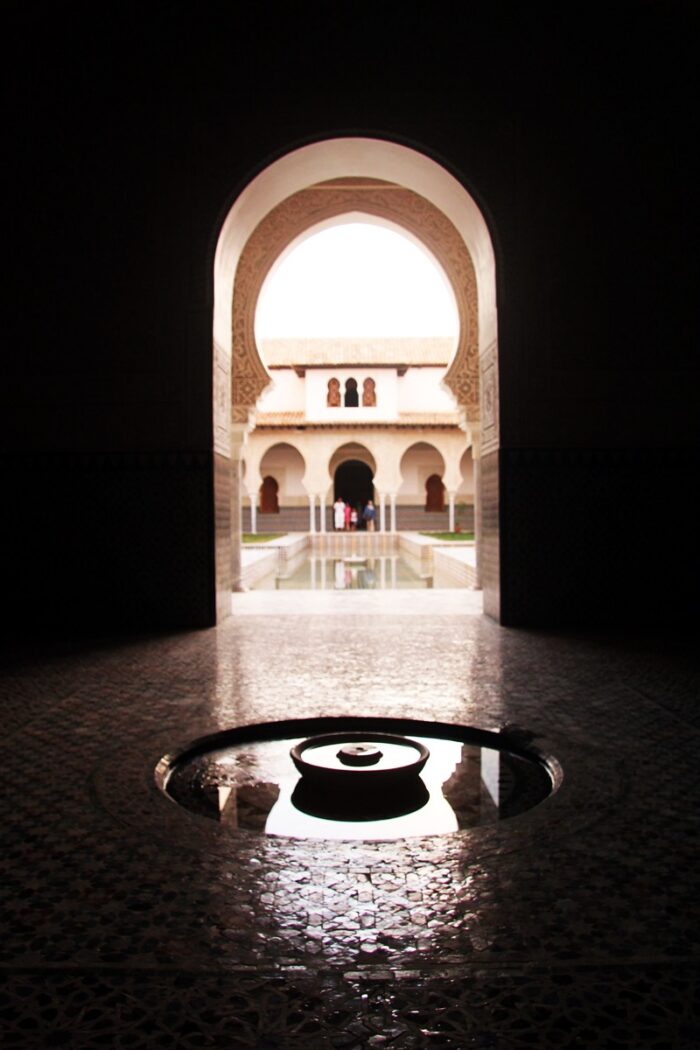
Always try different angles and see which one works best, creates a stronger composition, or captures more objects in a single shot. Give your pictures a unique touch, and you’ll see how much people love them.
PEOPLE PERMISSION
When traveling and taking pictures, don’t focus only on landscapes, streets, and buildings; try photographing the people you meet, especially those who make the place unique, like street sellers and store merchants in local markets.

But you can’t take peoples’ pictures without their permission, try to approach the person and try opening a discussion, asking about the place, the best areas, then tell them if possible to pose for a picture, sometimes you can face people asking for money or to by something in order to give you permission to take their picture, I personally never paid to take a picture, but consider this like adding a value to your picture.
Another method is taking their picture without them noticing; it will be a spontaneous candid shot. After you take the picture, approach them, chat, and show them the photo. If they like it, they’ll definitely give you permission to keep it; if they don’t, delete it and be professional. Already did that in Milan, a girl was enjoying the sunlight in the Piazza del Duomo, I took the picture and after that, asked her if she likes it, she did, shared an email to get a copy, that’s how you do it.
POST PROCESS
When I started learning photography, I thought post-processing was cheating. I didn’t like it at first, but when I saw many professional photographers edit their pictures before publishing, I thought I might give it a try.
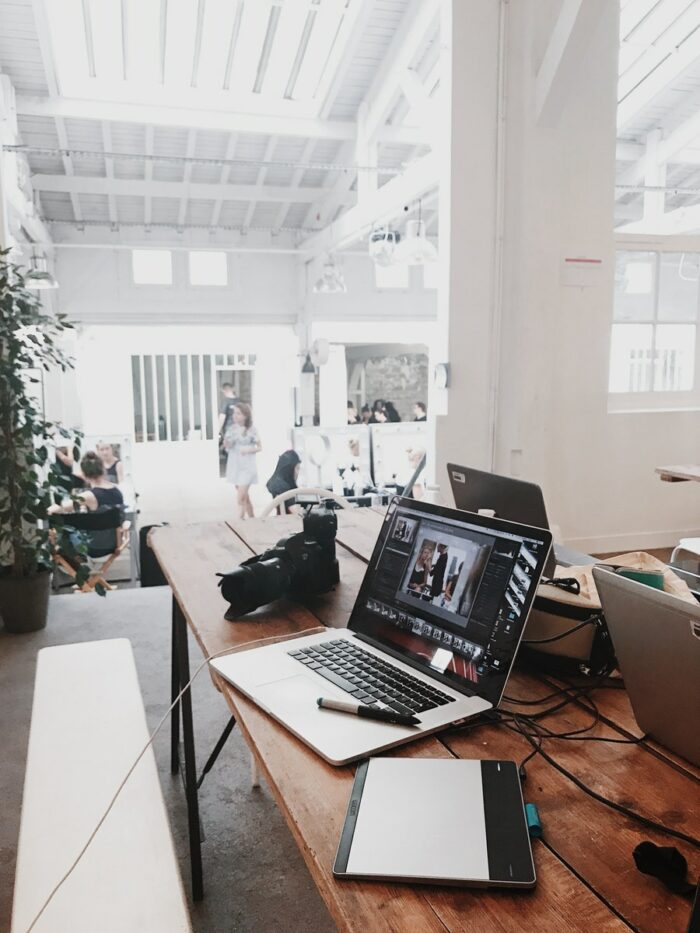
Post-processing lets you improve parts of a photo your camera couldn’t, like contrast, light, saturation, and color.
I don’t recommend advanced tools like Adobe Photoshop if you are a beginner or don’t have the budget; start with GIMP, Snapseed, or another free, easy tool to edit your travel images.
Once you gain more experience editing your pictures, you can take it to the next level with Adobe Lightroom; I recommend watching YouTube tutorials and choosing the software that best fits your needs.

Also, some professional DSLRs have built-in software to edit images, or you can upgrade the camera’s firmware and use an external firmware like Magic Lantern or Cinestyle.
If you are using a phone to take pictures, you can find some good apps that help you edit pictures before posting on your social media account.
BEGINNERS TRAVEL PHOTOGRAPHY TIPS
- Before you go on a trip, try scouting the location and identify the best spots take good pictures, also getting in touch with local photographers give you a great opportunity to take a picture like a local, because when is the new place that’s it. Otherwise, you’d be taking pictures like a tourist; the results would be one of a million, and your pictures would be good and outstanding.
- Keep in mind that traveling isn’t only about taking pictures, sometimes you need to put your camera down and enjoy the moment, you can do both, taking a picture than enjoying the view before leaving to your next destination.
- We already cover light as the most important key in travel photography, when it comes to natural lights weather is the master here, you don’t want to get to your destination and find out that there’s no sunlight and only grey skies with a lot of rain.
- Sometimes you need to get lost on purpose to find good places tourists don’t visit; you’ll find a quiet place with local subjects to compose a great picture.
- You don’t need to pack everything you have at home; keep your backpack light and travel only with the equipment and gear you really need for the trip.
BE SAFE
Protect yourself against theft: you don’t need to carry it on your arms, but you should insure your camera, note its serial number in case of theft, and keep your gear protected when you’re not shooting.
Always back up your travel photos: even if you carry a spare memory card, losing one full of pictures is a sad story to tell when you get home. So make sure to back up your pictures both offline, using an external hard drive, and online, using cloud storage like Google Drive.
RESOURCES:
nomadasaurus.com, erickimphotography.com, expertvagabond.com, headventurejunkies.com, and photolemur.com.
About the Author
Ayoub CA is a Digital Nomad who works with TravelEvil to make the travel world more exciting and easy for beginner travelers.
Ayoub believes travel isn’t about visiting many places; it’s about having fun and enjoying the trip based on your interests and style. Ayoub holds a BA in Architecture and Home Design and has worked as a freelancer for a long time while traveling the world, showing people how easy travel can be once you start your travel journey.
Also see: