Understanding the effects of aperture, shutter speed and ISO on images: Travel Photography 101
Anyone can take pictures nowadays and depending on your purpose, you don’t even need a proper camera. However, there is a big difference between a good picture and a great one, especially in travel photography when you usually have no control over your environment. The best travel photos are a product of a good quality camera and the photographer’s skill in using three controls for exposure: aperture, shutter speed, and ISO.

Photography Diagram by New Mobile Life / Travel Photography 101 – effects of aperture
Also Read: Travel Photography Tips for Great Landscape Photos
If you are having an “Aha!” moment, then chances are you have a camera that have all these things and you never knew how to use them. Knowing where and what they are and understanding their effects will not necessarily make you a great travel photographer. Only practice can get you there. However, it is a good start.
Aperture
The aperture is how you can control how much light gets through the lens by regulating the size of the hole. Don’t bother trying to look for the word “aperture” on your camera, it’s not there. What you will see is something like this:

The numbers in the red box represent the aperture settings, called f-stops. In the image above, it is set at 11, which is referred to as F11 or f/11. You see that the numbers range from 2 to 22, although some cameras go as low as 1.4, which represents the widest possible opening. The rule of thumb is the higher the number i.e. f/22, the smaller the opening. An f/11 will be about middle and will let some light through. However, the aperture size will also affect the depth of field, where a low aperture means a shallow depth of field. For example, if you choose f/2 because the sky is overcast, it also means only your subject will be in focus. Everything around your subject will blur. This is an important consideration if you want to take the background to be clear as well. Choose as high an aperture you can use to have a smaller aperture, and the background will also sharpen. Confused? Check out the photo below to get a better idea of what this means.

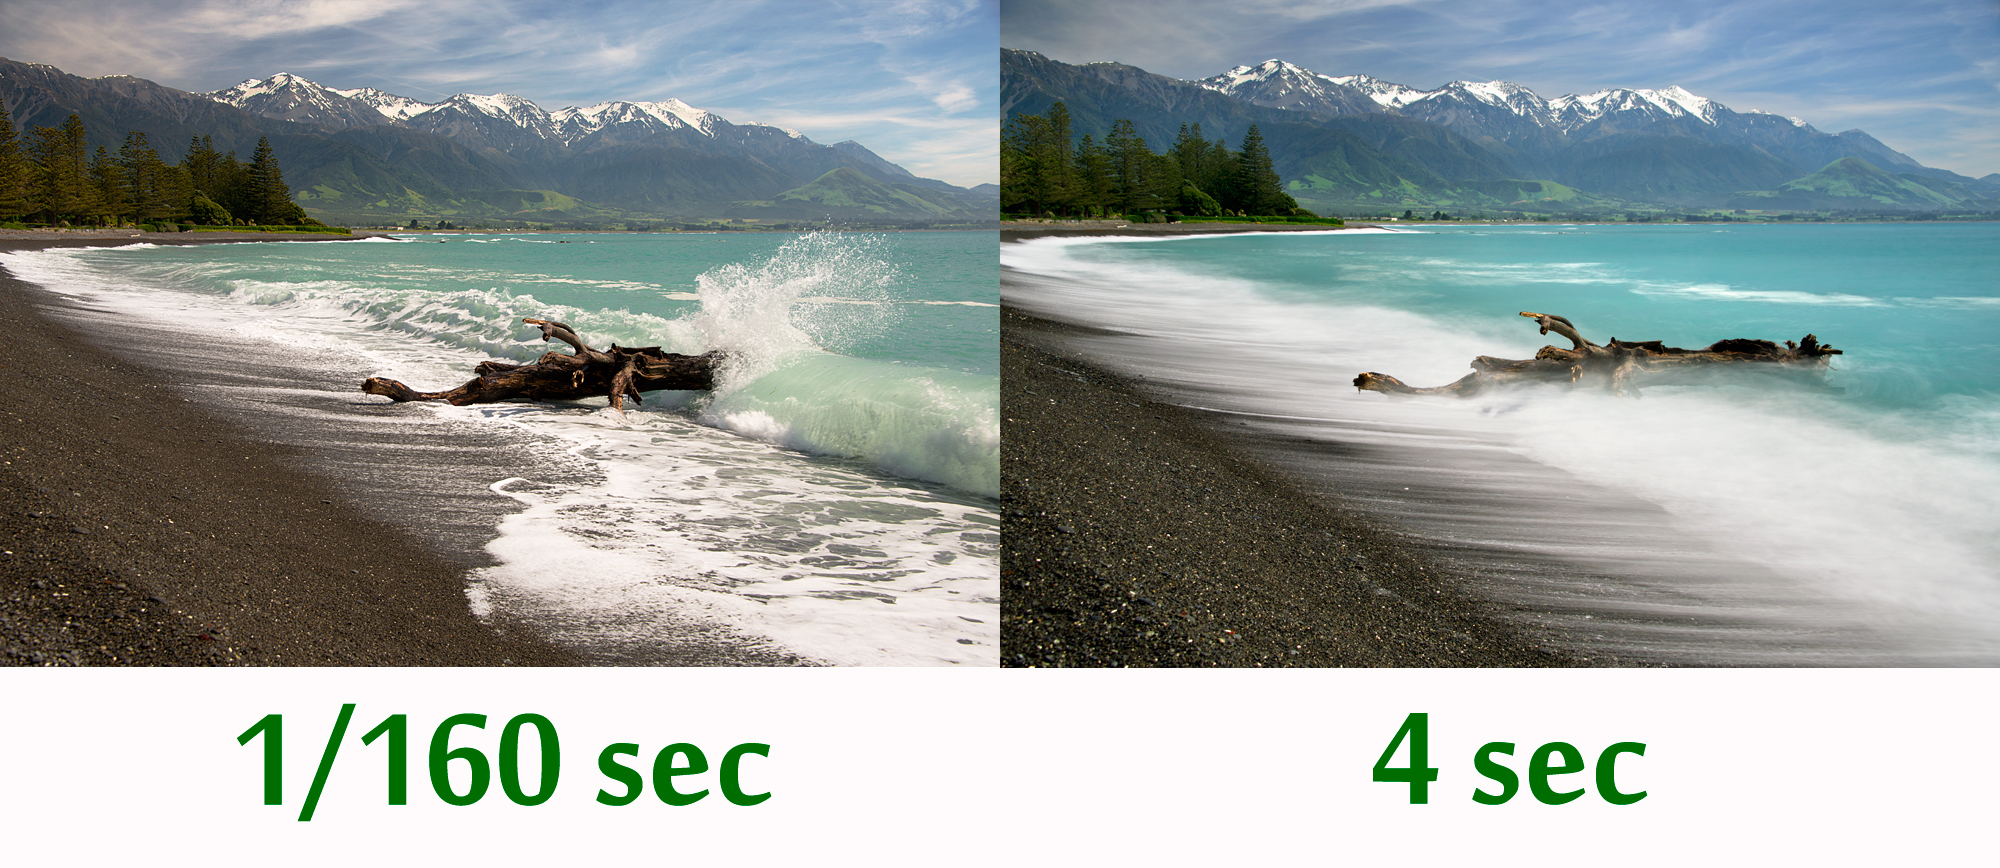
Shutter Speed
As you can imagine, the shutter speed is the speed in which the shutter opens to expose the film (or the digital sensor). The faster the shutter speed, the less light gets in. This is usually measured in terms of fractions of a second. The rule is the higher the denomination is, the faster the speed. For example, 1/1000 is much faster than 1/30. A shutter speed of 1/250 will let in twice as much light as one at 1/125.

You can use high shutter speeds when there is a lot of light, and you are capturing something in motion like waterfalls because it does not have a chance to blur or for your hands to shake. However, if you have low light, you need a slower shutter speed to allow more light in or your image will not be clear. You can control your shutter speed using the dial as illustrated below or something similar.

ISO
A lot of photographers assume “ISO” is an acronym, and various online resources may even tell you that it stands for “International Standards Organization.” At any rate, ISO also used to be called ASA (American Standards Association, another mystery), which for people old enough to remember buying film for their cameras were marked as ASA 100, 200, and 400. ISO or ASA refers to how sensitive the camera is to the light. A camera set to ISO 100 is less sensitive to light than ISO 400.

Generally, ISO 100 gives a clear, noise-free image, but when it is too dark, you need a higher ISO setting. However, higher light sensitivity usually means grainier images. Deciding on the setting is a striking a balance between clean but dark images and grainy but visible ones. In digital cameras, you can adjust the ISO settings from the menu.

Putting it together
It can seem overwhelming, but these settings are like putty in your hands. It depends on how you want your photos to come out, and how much practice you put in. In travel or even in product photography, you might have little chance to think, so it is important to practice with using these settings on your camera before setting out. Experiment with different lights and shooting conditions i.e., in a moving car to see what settings work best for you. With time, it will become second nature.
Remember Practice makes Permanent!

